Last Updated on June 3, 2023 by admin
If your basement is flooded with water, it can cause a thousand of dollars of damage to your home. Along with this, the equipment and furniture in your basement will also get damaged. You can’t deny that water problems are something no one wants to deal with.
And if you want to keep the water running properly and keep the basement safe, you must install a sump pump there. However, installing a sump pump will require the installation of the sump pump basin. But do you know the process of sump pump basin installation?
No worries if you don’t know how to do sump pump basin installation. It is because we are going to discuss it here for your convenience. After this, you can easily install a sump pump basin and the whole sump pump without your plumber.
Table Of Contents
- 1 Understanding the Essential Role of a Sump Pump Basin
- 2 Equipment and Tools
- 3 Step-by-Step Sump Pump Installation
- 4 Sump Pump Basin Install Tips for Crawl Spaces and Basements
- 5 Frequently Asked Question
- 5.1 How do you install a sump pump basin?
- 5.2 Where do you put the holes in a sump pump basin?
- 5.3 How deep should a sump pump basin be?
- 5.4 Should the sump basin be perforated or not?
- 5.5 How much does it cost to install a sump pump pit?
- 5.6 Should a sump pump sit on gravel?
- 5.7 Should I unplug my sump pump in the winter?
- 5.8 Do you need a plumber to install a sump pump?
- 6 Wrap Up
Understanding the Essential Role of a Sump Pump Basin
A sump pump basin, sometimes referred to as a sump pit or sump basin, is a crucial component of a sump pump system that is typically found in the basement of homes or commercial buildings. It serves as the collection point for water that seeps into the foundation or accumulates due to weather-related events.
A sump pit is a receptacle, often constructed of sturdy plastic or metal, located at the lowest point of the basement. Sump basins are usually about two to three feet deep and one to two feet in diameter, depending on the specifications of the building and the amount of water to be managed. The design is such that all water flowing into the basement will naturally gravitate towards the sump basin due to the downward slope of the concrete floor and surrounding area.
The water in the sump basin triggers the sump pump once it reaches a certain level. Most sump pumps have a float that will automatically turn on the pump when the water reaches the predetermined level. The pump then proceeds to expel the water from the basement through a discharge PVC pipe leading outside the building.
Therefore, the sump pump basin plays a key role in preventing basement flooding and mitigating water damage. It collects not only the water that naturally seeps in due to the water table but also the excess water that could enter the basement during heavy rainfall or snowmelt.
While the primary purpose of a sump pump basin is water collection, it also serves as a protective casing for the sump pump. It shields the pump from debris that could potentially damage its mechanisms, hence extending the lifespan of the sump pump. The basin is generally covered with a lid or seal to minimize the potential for debris, objects, or small animals to fall into the pit, and to reduce noise and moisture evaporation when the pump is running.
A well-maintained sump pump basin is an important aspect of a functional sump pump system. It requires regular inspection and cleaning to ensure its efficiency. Over time, silt and debris can accumulate in the basin and reduce its water-holding capacity. This buildup can trigger the pump to work more frequently, potentially leading to premature pump failure.
A sump pump basin not only collects and directs water to the pump, but also acts as a protective housing for the pump, enhancing its durability and performance. Understanding the role and maintenance of a sump pump basin can help homeowners and property managers prevent basement flooding and reduce potential water damage.
Equipment and Tools
Before you start the sump pump basin installation in the basement, you have to get the equipment and tools first. In the middle of installing sump pumps, you cannot stop your work and get the tools.
So, before you start, you have to get ready the project supplies that are needed for the complete installation process of the submersible sump pump basin.
- Sump pump basin
- Sledgehammer or jackhammer
- Gravel
- Drill (driver with a hole saw bit)
- Filter fabric
- Paver (make sure you go for the paver that easily fits the bottom of the sump pump basin)
Step-by-Step Sump Pump Installation
Step 1: Basement Tour
After you are done arranging the sump pump installation components and the required tools, you can start the process of installing them. As you are going to install it in the basement, you have to go through the concrete floor first.
Before you start the process, you must go for a basement assessment. If you want to do all this work by yourself, you have to know your basement as much as the plumber does. And so, look around the basement of the house.
Look at the places and also notice if there is water in the basement or not. There are people who don’t use pedestal sump pumps. You have to know where you are going to install the sump pump.
Step 2 – Lowest Point of Basement
As you are already on an assessment of your basement, you have to go through the lowest point of the basement floor. We know this might seem a little weird for you but you have to do is for installing the sump pump in the basement of your house.
If you cannot find the lowest point of the basement floor, you must follow a trick. You cannot see it with your eyes only. So, for a better result, you have to find a place where there is more moisture accumulation than the other places. If you find it, you must know that this is the lowest point on the basement floor. For outdoor sump pit basin installation also, you have to select the lowest point of the property.
Step 3 – Dig it up
So now that you know which the lowest point of the basement is, you have to move the other objects and furniture from the place first. After you have cleaned the place, you have to dig it. Yes, you heard right. All you have to do now is dig the pit.
Digging the sump pit might be tough but who said it’s going to be easy? Get a spade, shovel, rake, or whatever you need. Get your tools ready and start digging the place. This might be tough for you and to reduce the pressure, you can let any of your friends or family member join you. In this way, the work will be done at a faster pace and you can save time and energy!
However, if you have a concrete basement floor, you might not need any help from anyone because it is easy to dig it. For breaking through, you can also get a sledgehammer or jackhammer.
While digging the hole make sure that you are digging the concrete floor in the perfect shape for the sump basin. As you are digging the sump pit for the sump pump, you have to dig it so that you can easily put the pump and accommodate it perfectly.
Step 4 – Measurements
As we have already said, digging is tough but tougher is doing the perfect measurement, trust us. You have to be very careful while digging the sump basin because the sump pump basin must fit in that place. If you think that the bigger hole you make, the easier it will be for the sump pump to fit then you are completely wrong.
So before starting the process, go through the perfect measurement. While you are digging, keep in mind the measurement of the sump hole. Measure the height of the sump pump. Now, add six inches to the measurement of the sump pump. All you have to do is dig the place measure the addition and keep the depth according to that.
And when it comes to the width, you have to repeat the same process. All you need to do is measure the width of the sump pump and then, you have to add the measurement with the inches. Now, while digging, you have to keep the width of the hole according to the addition of these two measurements.
So, cheer yourself up and keep digging. Continue the process till you think that you have reached the adequate measurement for the sump basin.
Step 5 – Layer is up
Now, you have to layer it up. Yes, we are talking about the sump basin. Before that, you have to get some filter fabric for this work. Now, take the basin exterior and then try to wrap around it with the filter fabric. You have to go for one layer only.
This process is done for preventing silt and sludge from any sort of clogs on the basin. If your basin is clogged, you already know what happened. So, you better be safe than sorry. Wrap the layer to ensure safety.
Step 6 – More Gravel
Now that you are ready with the basin, your work is to add a little gravel. Look at the bottom of the hole that you have created. And there, you have to add more gravel. Put more or less 2-3 inches of gravel to make the place perfect for the basin.
For more security and perfection, you might take advantage of the fieldstone or a paver. Place it over the pebbles for making the platform established and stable.
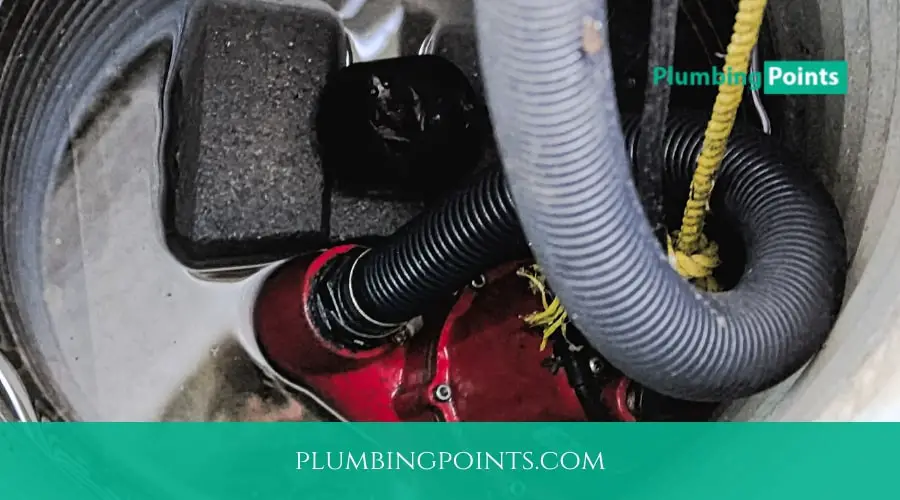
Step 7 – Place the Sump Pump Basin
Now that you are done with digging the hole perfect for the sump pump to stay, you have to take the sump pump basin and place it into the hole. As your hole is completely stable, you do not need to worry anymore. The basin of the sump pump will easily settle in that place.
And after that, you are also free to add the sump pump to the basin and make the whole process work fine. All you need to do is have a little patience and put effort into placing the sump pump properly and in the right place.
Sump Pump Basin Install Tips for Crawl Spaces and Basements
Frequently Asked Question
How do you install a sump pump basin?
To install a sump pump basin, you’ll need to remove the existing pump (assuming it cannot be cleaned), install a new one in its place (using hoses that will connect to a nearby drain), and fill it with about an inch or so of water. Secured any loose wiring on the outside of your home around the sump pit area before closing up the hole. Hope this helps!
Where do you put the holes in a sump pump basin?
Ideally, the hole goes directly back to a pipe that leads back underground. The sump pump must then drain both water and air from the basin. If there’s no way for the water to be drained out of the hole, it could end up in your basement when you least expect it!
How deep should a sump pump basin be?
It should be deep enough to take in the water flow from the sump pump. Without a sump pump basin, the pump will only be able to do so much and eventually raises pH levels within your pipes by pushing acidic water at high speeds through them.
Should the sump basin be perforated or not?
Only one side of the basin should have perforations. This is the “out” or discharges side, and it needs to be downstream from the “in” or suction side so that clean water can always enter on do to lift out dirty water in this way. You don’t want your pump sucking in air through these holes!
How much does it cost to install a sump pump pit?
The cost of a sump pump pit is quite dependent on the size, depth, and where it’s installed. Typical installation costs for a basement get-away are in the $1,000 range.
Should a sump pump sit on gravel?
No. Do not have your sump pump sitting on top of the gravel.
Should I unplug my sump pump in the winter?
Yes. When the sump pump isn’t running, it’s a lot easier to check the water level, clear out sediment and debris from the passageways or valves, make any necessary repairs on hoses or valves too.
Do you need a plumber to install a sump pump?
No, you do not need a plumber to install a sump pump. It is relatively simple and straightforward. I am not a plumber, so my answer is that it depends on the condition of your home, but generally, if you have a sump pump then you are familiar with installing plumbing.
Wrap Up
The sump pump basin installation process is not too tough. But before you start the process, you have to make sure that you are ready with all the tools you need.
Also, for digging and drilling, you have to be careful and have a little experience in this field. As you have to put in physical effort, make sure that you do the work on the weekends so that you can complete the whole process of the sump pump basin installation and the sump pump installation in a day.
Go through the sump pump basin installation instructions we have provided here for sump pump basin installation, you will not need a plumber for this work anymore. Let us know how you do the installation in your basement or crawl space.