Last Updated on August 28, 2022 by admin
Calling the plumber a hundred times to take care of the water problems of your house is very annoying. If you are facing this almost every day, there is a good chance that there is an issue with the waterline. And if you are searching for the easiest solution, the sump pump is the key!
Yes, installing the sump pump in the basement can solve almost 70% of your problems regarding the water! But do you know how to install a sump pump in the basement? This is why we are here!

We will talk about the whole process of installing the sump pump so that you don’t need your plumber anymore.
Table Of Contents
- 1 Step by Step Guide how to install sump pump in basement
- 1.1 Step 1: The Right Location
- 1.2 Step 2: One, two, HOLE!
- 1.3 Step 3: Increase Gravel
- 1.4 Step 4: Adapters to Connect
- 1.5 Step 5: Valve Installation
- 1.6 How to Install a Sump Pump | This Old House Basement
- 1.7 Step 6: Channel Water
- 1.8 Step 7: Run PVC
- 1.9 Step 8: Sealant Application
- 1.10 Step 9: Water Dispense
- 1.11 Step 10: Cover it up
- 2 Parcel Up:
- 3 Frequently Asked Question
Step by Step Guide how to install sump pump in basement
Step 1: The Right Location
Before you are already ready for the installation sump pump, you have to stop and think about the location. If you install a sump pump in the finished basement, it is going to be a little tough. Before getting in, proper research on the location is necessary. When you are searching for the location, make sure you give importance to the place where the water collects.
If you have any idea about GFCI, then you already know that the location of the sump pump should be near a GFCI. GFCI basically refers to Ground Fault Interrupter Outlet. Here, the sump pump will be plugged in. The nearer it is to the GFCI, the better it will be for you.
There are situations when you do not get a plug near the site. In this case, you must go to a certified electrician and let him install one. It is because, without the plug near the site, you won’t be able to install the sump pump!
Step 2: One, two, HOLE!
Yes, now, the toughest part of the sump pump installation arrives. You have to dig a hole! When you are going to install a sump pump on the basement floor, you will always need a big hole for this! We know that digging a hole is really very tough. And also, you have to get prepared for it because you will need to pump effort into getting this work done.
However, this can be fun for you if you really like enjoying these sorts of tasks. Before you dig it, measurement is necessary. Make sure that the hole you are going to dig is about six inches in depth more than the Sump. On the other hand, the width should be 10 inches more than the Sump. At the bottom of the hole that you have dug, you have to place three inches of gravel first.
Now you are done! All you have to do is place the Sump inside the hole you have dug. Here, you can call any of your family members of your friend for helping you digging the hole. If you do this, it will be a lot easier for you to complete the whole task in time.
Step 3: Increase Gravel
It is time to make the work more perfect. And for that, all you need to do is stand in the Sump first. After that, you have to take more gravel with the help of your friend or by yourself. Now, your work is to add gravel around the Sump you have placed inside the hole. Try and add more gravel as per the requirements.
In this case, you have to make sure that at the top of the Sump, you have kept more or less two inches exposed. This will help you later, trust us! And after you are done with adding up gravel, your task is now done. Now, the only thing you need to do is prepare your Sump pump for the operation!
Step 4: Adapters to Connect
As we have told you already that you have to prepare the pump now, start your work with the adapter. First of all, you have to find glue that can help you attach the adapter to the pipe. Take the glue in one of your hands and take the male adapter in the other.
Now glue it and attach it with the PVC discharge pipe. After you are done, you have to take the female adapter. Now, place the glued male adapter with the PVC discharge pipe into the female adapter on the pipe.
After you are done with the adapters, you have to get a drill that can do ¼ inch drill. Use that for creating a hole into the discharge pipe. Here, make sure that the pump is six inches lower than the drilled hole. We will call this hole- a weep hole. When you will turn the pump off for priming it, with the help of this weep hole, the water will flow back into the pump!
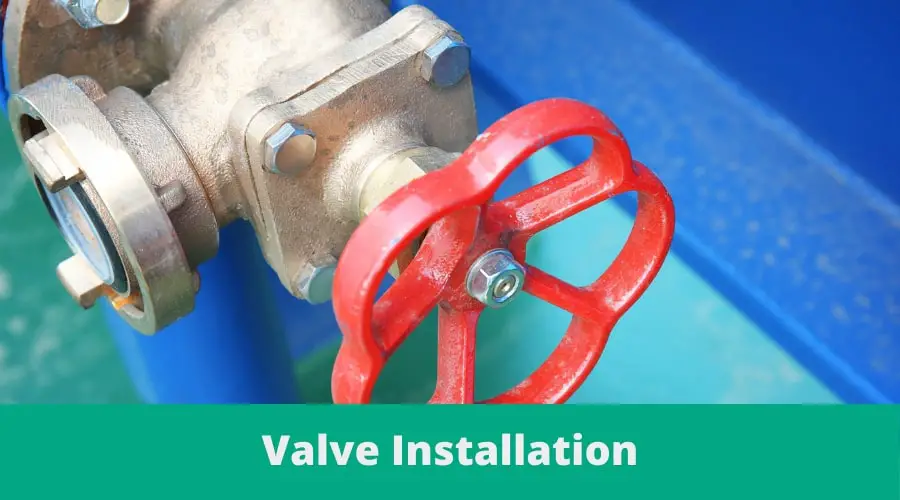
Step 5: Valve Installation
If you are going to install a sump pump in the existing basement, you can start the process from here. For this step, you will surely need wire tires. Get some wire tires and get back to the work. All you got to do is add the discharge pipe to the electrical cord of the pump. And for adding the cord with the discharge pipe, you have to use wire tires.
Now, you have to go for a check valve and install it. On the open end of the discharge pipe, you have to install the valve. Now, all you need to do is take the pump and put it n the sump. Now, get ready for running the water out of your house now. While selecting the check valve, go for the one that has the vertical operation.
How to Install a Sump Pump | This Old House Basement
Step 6: Channel Water
People are always confused about how to install sump pump in basement. For doing this properly, one must follow all the steps properly even if the step is trivial. This step is a very short step however you need to do it very carefully. All you have to do here is channel water away from your house. Now, for this work, you will need 11/2 inch PVC.
Along with this, pressurized fittings will be needed too. Make sure you have these all. With these, you can easily channel water from the pump and then, channel it away from your house!
Step 7: Run PVC
You already know that you are done with channeling water away from your house. Now, you have to run PVC through the wall first. And for this, you will need “J” hooks. Get J-hooks first. You will need these for hanging the PVC from the joists.
Go to the wall and make a hole that goes exactly to the other side of the wall so that you are able to run the PVC. For making this hole, you will need to work a little hard. If you are dealing with a block wall, you can take the help of a hammer. Brick walls might be easier to break with rotary hammers.
Step 8: Sealant Application
Now, you are almost done. You have to go for a silicone application now. Keep an eye on the hole outside of the wall through which the pipe comes out. Now, you have to apply a silicone sealant in the place. After you are done with applying silicone sealant, you have to complete the connections.
As you have to run the water, you have to complete the connections. Ensure that you are running the water more than four feet away from your house!
Step 9: Water Dispense
For this step, you will need the 11/2 inch increaser for adding it to the end of the pipe. You have to add it because you will need to spread out the flow of the water. SO, get an 11/2 by three inches increaser first.
After doing this, you have to give importance to dispensing the water more. And for that, you will need the corrugated pipe. Now, you have to add the PVC pipe and the corrugated pipe together. You will now see the water dispense the way you have always wanted!
Step 10: Cover it up
Great job, you are ready with the sump pump! You have completed the installation process already. Now, you have gone through the corrugated pipe and you have to place gravel around it.
Now, you have to plug the pump first. Now, you are done with work! All you have to do is place the cover of the sump over it!
To learn more perfectly about the sump pump, you can go through the sump pump installation diagram that will tell all the details regarding the structure of the sump pump.
Parcel Up:
The best way to reduce the money you are wasting on your plumber is to install a sump pump. And if you are into a dilemma about how to install sump pump in the basement, we have come up with the solution for you.
We have discussed the process in detail. All you need to do is go through the steps and follow them correctly. We ensure that you won’t need to pay for your plumber anymore because now you can solve your own issue if you are with us!
Frequently Asked Question

How much does it cost to install a sump pump in a basement?
Sump pumps generally cost $650 – $950. It can take a professional between 1-2 hours to install a sump pump system in your basement or crawl space, depending on the size of your home and how many pumps you need.
How do you install a sump pit in an existing basement?
If you have a sump pump in your basement and the water spills over from time to time, then it is likely that you will want to install a sump pit. A nice way to go about this would be to pour concrete levels on the floor, install a rubber membrane at least twice as high as where the bottom of the sump pit should be cut out (bedrock), and carve out space for the catch basin below that point. The area for installing these components must have plenty of ventilation so no pools form.
Can I install a sump pump myself?
Sure, it may not be as easy as installing your dishwasher, but you can definitely install a sump pump yourself.
Where should a sump pump be placed in a basement?
You should place the sump pump at the lowest point in your basement. A good guideline is to put it about one foot lower than where your water level usually is when it reaches its peak. If you have a daylight window, plug it with a clay-based pottery product like Geology Rock or use a clear plastic bag to cover the window.
Related resources