Last Updated on November 19, 2022 by admin
How do you feel if you find your toilet valve is not working just after you use it? For sure, you will be in an embarrassing situation. But don’t worry too much. Every day a toilet valve opens and closes several times. And due to this, the toilet valve will not be in a position to work correctly after some time learn how to replace toilet fill valve in this guide.
However, replacing a toilet valve is significantly relaxed, and any homeowner can do this with the help of a few tools. In this article, I will show you how to replace the toilet valve and flapper.
Table Of Contents
- 1 Why Do You Need to Replace the Toilet Valve?
- 2 Required equipment:
- 3 Part 01: Dispatching the faulty toilet fill valve
- 4 Part 02: Altering the New Valve
- 4.1 Place the new toilet fill valve:
- 4.2 Ensure all the gaskets are in the exact place:
- 4.3 Be careful while tightening the fill valve:
- 4.4 Reassembling the water supply:
- 4.5 Fine-tune the float:
- 4.6 Frequently Asked Question
- 4.7 Is it hard to replace a toilet fill valve?
- 4.8 How do I know if my toilet fill valve is bad?
- 4.9 Are toilet fill valves universal?
Why Do You Need to Replace the Toilet Valve?
Generally, the life cycle of a toilet valve is 5 years. After 5 years, if you did not replace your toilet valve, you will start facing different Best toilet fill valves problems that are
- Unusual sounds like screeching.
- Toilet flush will work inappropriately.
- The unlimited time required to refill the tank.
- You can’t stop the water flow.
As I already said, replacing it is simple, and you can purchase the required apparatus from any hardware store. Follow the below step-by-step procedure.
Required equipment:
- A wrench or Pliers
- New toilet fill valve kit
- Bucket.
- Towel.
- Wet-dry vacuum.
Part 01: Dispatching the faulty toilet fill valve
Stop Water Supply:
I believe every person in your home knows about the location of the water supply valve. Before starting, make sure the water supply valve is turned off. Otherwise, your home will be flooded. Just behind the toilet, you will find a Turn knob on the wall. Turn off the valve clockwise and continue until the valve stops moving.
Empty the water tank:
Once you turned off the toilet valve, before disconnecting the toilet fill valve, empty the water tank fully. To do so, hold the flush lever and press it down until the water drains as much as possible. There will be a little amount of water remaining at the bottom. Use a wet-dry vacuum or a turkey buster to remove this small amount. Or you can use a towel or a sponge to soak up the lasting water.
Trace the toilet fill valve:
Once water is drained correctly, now it is time to trace the toilet fill valve. While removing the toilet lid, be very careful; wrap it with a towel and keep it aside to avoid any accidental situation. A toilet valve is placed inside the toilet tank, usually stayed on one side.
In a new toilet, you will find a whole plastic column, and it consists of a float and an on-off lever to fill the toilet tank. In old toilets, the float is a separate piece, and it is linked to the topmost of the fill valve.
Remove the toilet fill valve:
It’s time to use the pliers or wrench. The toilet fill valve is connected to the water supply line by a nut, and you need to open the joint. Move the pliers or wrench counterclockwise and loosen the nuts. Take out the valve from the tank carefully. While unscrewing the nut, some water may come out from the tank, use or keep a towel on the floor to absorb up water.
Now it’s time to purchase a new toilet fill valve. Visit your local hardware store to do so. Every toilet fill valve is standard and able to fit in any toilet. If you are a bit worried about it, take your old toilet valve along with you and assess with a new one whether it will work or not.
Part 02: Altering the New Valve
Place the new toilet fill valve:
Unwrap the packaging of the new toilet valve. Make sure; you have taken the instruction paper with it. Also, you don’t need to assemble the valve as it is already assembled (while purchasing, don’t forget to check this). So, quickly you can put the new valve into the toilet tank.
Ensure all the gaskets are in the exact place:
It is essential to give an eagle eye to the number of washers and nuts available with the valve. Attach the nuts correctly using pliers or a wrench. Two washers are there, the first one is on the inside, and the second one is placed on the outside of the toilet tank.
The new valve drives over it. Ensure a watertight seal around the joint of the inside and outside washers. Otherwise, water will leak out. You might be interested in the Fumoto valve review.
Be careful while tightening the fill valve:
After putting everything in place, the next step is to tighten a lock nut. You will find a threaded part at the valve that is placed the under of the tank. The lock nut needs to tighten at the threaded portion and don’t hurry. Tighten it carefully, and don’t forget to use your hand. Also, make sure it is not tightening too much.
Reassembling the water supply:
Once the toilet fill valve is at the exact place, let’s start the water flow again. Join the water supply line with the bottom of the valve. A washer must be placed inside at the final position of the water supply line and confirm tightening using a wrench or pliers. Move the shutoff valve counterclockwise to start filling the tank with water.
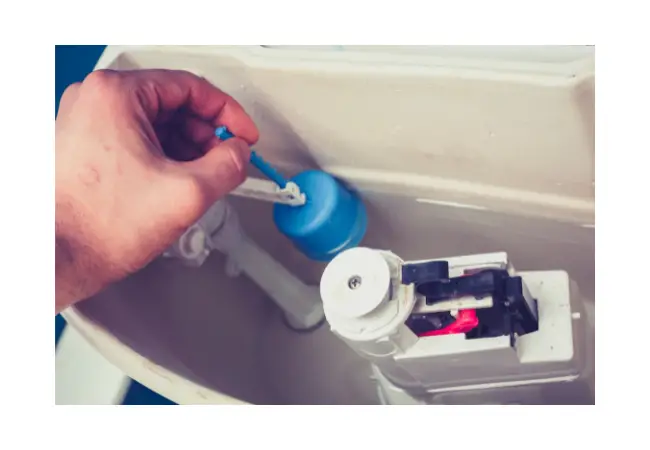
Fine-tune the float:
You have to wait to adjust the float until the toilet tank is filled with water. You can adjust the float location in 2 different ways. The float has a clip on its side and a set screw at the topmost of the float shaft. Also, use your pliers or wrench to tighten a screw at the topmost of the new toilet fill valve where the float fastens.
Finally, you completed the installation of a new toilet fill valve. For the next couple of years, you are free, and replacement is not required. So, don’t you think it is effortless to change a toilet fill valve? A big clap from my side for your successful project.
Frequently Asked Question
Is it hard to replace a toilet fill valve?
This depends on one’s skill level. If you are experienced at doing plumbing work, the process should not take that much time and effort. However, those who lack plumbing knowledge may find it difficult to replace a toilet fill valve.
How do I know if my toilet fill valve is bad?
If the fill valve no longer lets water flow from the tank to the bowl, it’s bad. To test this, flush your toilet and then turn off your water supply: if you still have good water pressure in your house then that will be a sign of a bad fill valve.
Are toilet fill valves universal?
No, toilet fill valves aren’t universal. They are, in fact, designed to correspond with the specific plumbing system which they will be used with. Toilet fill valves are designed for 1/2″ and 3/8″ waste lines that are gravity fed down from the floor of an upper level kitchen or bathroom.
