Last Updated on August 27, 2022 by admin
A thermostatic mixing valve is a necessary gadget for showering in the bathroom. It will make sure you are bathing with perfectly blended water at a safe and suitable temperature. You can install this gadget as the thermostatic mixing valve installation process is not complex. It will become easier when you have all the necessary tools for installation.
But performing this task will require your experience in this sector. But it is not possible to be experienced when you are doing it for the first time. In that situation, you can take instructions from a veteran while installing it. Learning this easy task will save you money as well.
Table Of Contents
- 1 The Necessary Tools and Materials for Installing a Thermostatic Mixing Valve
- 2 Thermostatic Mixing Valve Installation – The Step-by-Step Processes
- 3 How to install a mixing valve
- 4 Frequently Asked Question
- 4.1 What is a thermostatic mixing valve?
- 4.2 Why is a thermostatic mixing valve so important?
- 4.3 Why do I need a thermostatic mixing valve installed?
- 4.4 How does a thermostatic mixing valve work?
- 4.5 Why does my shower temperature fluctuate?
- 4.6 Where do you put a thermostatic mixing valve?
- 4.7 How much does a thermostatic mixing valve cost?
- 4.8 Is a thermostatic mixing valve worth it?
- 5 Conclusion
The Necessary Tools and Materials for Installing a Thermostatic Mixing Valve
You need some necessary tools and materials to make the joint between pipes and detaching them. At first, you need to buy a thermostatic mixing valve from any shop near your house. Hopefully, you will find one at a reasonable price and don’t forget to check it before buying.
The company won’t assemble the thermostatic mixing valve. So, open the packet and check whether all the components are there or not. You will need to have the other tools as well for installation. So, all the necessary materials and tools are:
- A perfect thermostatic mixing valve
- A pair of wrenches
- Pliers
- A couple of hand gloves
Thermostatic Mixing Valve Installation – The Step-by-Step Processes
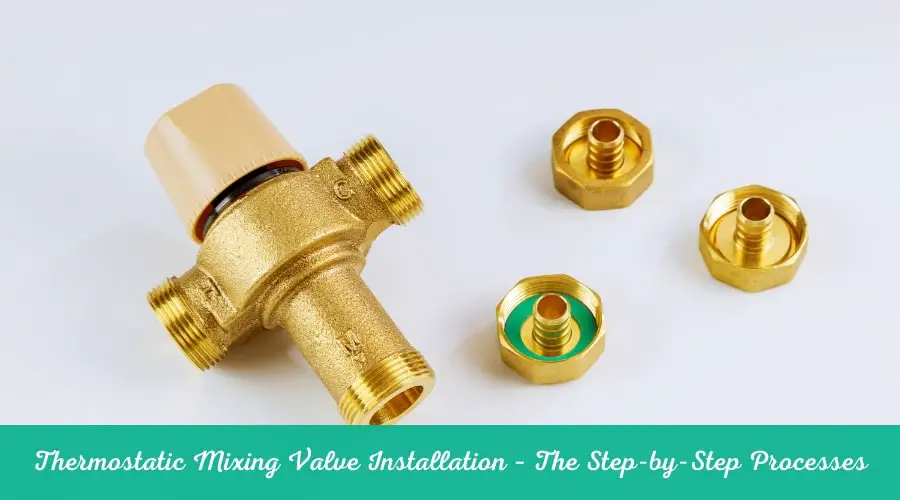
When you gather all the necessary components, you can start installing the thermostatic mixing valve. The processes of how to adjust a thermostatic mixing valve are:
Step-1: Assemble the Thermostatic Mixing Valve
The thermostatic mixing valve will not be fully assembled when you buy it. So, you need to assemble the whole gadget before installing it. You will see two pipe connectors beside the valve. At first, put those connectors in two loops respectively. Then on both the connectors, place a rubber washer as well.
When you take the mixing valve, there will be three plugs on each end of it. You need to remove those to install the connectors there. There will be two side-mounted ends in the valve for connecting them with hot water and cold-water sources. Then attach those two connectors with the two side-mounted ends.
One side of each connector will be free and attach a nut there for pipe connection.
Step-2: Dry-Out the Water
You need to empty the water from the hot and cold pipes before installing the mixing valve. Along with the shower, you can install the thermostatic mixing valve under sink as well. At first, shut off the water connection to the shower or the sink from the water tank.
Still, there will be some water left in both pipes. Open the tap of both the shower and sink to eliminate the rest of the water. You can also isolate the water from both pipes if you have extra valves in them.
Step-3: Installing the Thermostatic Mixing Valve
Then comes the part of the thermostatic mixing valve installation. Take off the head joint connections of all three pipes with a wrench. Then, you will see a total of three pipes coming to the place where you install it. There will be an indication in the mixing valve body about which end to connect with which water source.
The red end should be connected with the hot water source and the navy-blue side with cold water. Apply some paste inside both the connectors, and then put pipes inside them to avoid leakage. To make the connection strong, tighten the new joints with pliers.
You need to connect the other end of the mixing valve with the shower pipe or the sink pipe in the same way.
How to install a mixing valve
Step-4: Temperature Controlling
There will be a cap on the head of the mixing valve, and under that cap, you will see the temperature controller. Turn that left to increase the temperature and turn right to decrease it. Then, check the water supply connection and enjoy the perfectly blended water mixture at a safe temperature.
Frequently Asked Question
What is a thermostatic mixing valve?
A thermostatic mixing valve is a type of plumbing fixture used to control hot and cold water. It’s an important component in any modern home as it will regulate the temperature of the water coming out of one’s shower or tap.
Why is a thermostatic mixing valve so important?
One of the most important elements to designing a highly efficient water heater is having good circulation. Good circulation means that once hot water has been heated, it does not spend time sitting idle waiting for someone to use it before the heat can be transferred. A thermostatic mixing valve enables a more rapid transfer of this heat from one water loop to another without using any additional energy input from an outside pump.
Why do I need a thermostatic mixing valve installed?
Mixing hot and cold water can lead to ‘scalding’ or at the very least, an uncomfortable hot sensation. Thermostatic mixing valves are installed for the purpose of taking care of this. A thermostatic valve mixes the incoming supply of hot and cold water on demand when a handle is turned, preventing scalding and providing a comfortable flow that’s never too cold or too hot.
How does a thermostatic mixing valve work?
A thermostatic mixing valve is used to regulate a temperature differential between two points. When the temperature of the fluid at point A is lower than that at point B, water continuously flows through the mixing valve from the hot side to the cold side until their temperatures have equalized.
Why does my shower temperature fluctuate?
Temperature fluctuations in your hot water can mean that the temperature is being regulated by your boiler, which means it will keep varying until it reaches a set point. If you are noticing large variations in shower temperature, have the water heater’s reserve tank checked or replace it.
Where do you put a thermostatic mixing valve?
The thermostatic mixing valve is usually installed at the cold-water shutoff, but it will need to be mounted at a right angle to the waterline. The valve will be installed before entering the boiler so that water only enters when it detects colder than setpoint temperatures.
How much does a thermostatic mixing valve cost?
The typical cost of a thermostatic mixing valve is $200 and upwards. However, the price can range anywhere from $80 to over $500 for smaller valves used in heating systems. If you’re installing solar panels into your home, you may be able to purchase one for free!
Is a thermostatic mixing valve worth it?
Insulation is expensive. A thermostatic mixing valve can save your wallet on high-running bills and be proud of the green homeowner’s choice. If the setting for the hot water is too low, make sure there isn’t a bowl under it collecting bathwater if you are doing laundry or dishes in it. It should still be 115 degrees or higher while trying to catch water in a bowl.
Conclusion
One can get into the deep tension about how to install a mixing valve. But it is not a complex process at all with the necessary materials and tools. At first, you may need advice and support from some experienced people. Once you learn it, you can perform the whole process of thermostatic mixing valve installation all by yourself.
Following the correct path with proper instructions will make the job easier for you. Checking the thermostatic mixing valve before buying is a must. Once you install the mixing valve, don’t forget the check whether it is working correctly or not.